
 BEX is my wife's nickname. I started GameBEX to get her into video games.
Install GameBEX
Install the Android app, add your games or a source plugin, and set up your controller.
Download and install the APK, allow file access, then add your games or a source plugin. GameBEX needs no account and isn’t on the Play Store.
Source on GitHub · Free software under the GNU AGPL-3.0-or-later.
Requirements
Section titled “Requirements”| Android | Android 8.0 or newer (Android 11+ recommended) |
| CPU | A 64-bit ARM phone or handheld (arm64-v8a) |
| Orientation | Landscape. GameBEX is a landscape-only console UI |
| Controller | Strongly recommended: a built-in pad, a phone grip, or a Bluetooth/USB controller. Touch works but is secondary |
| Storage | A microSD card is recommended for large disc images; internal storage works too |
Install steps
Section titled “Install steps”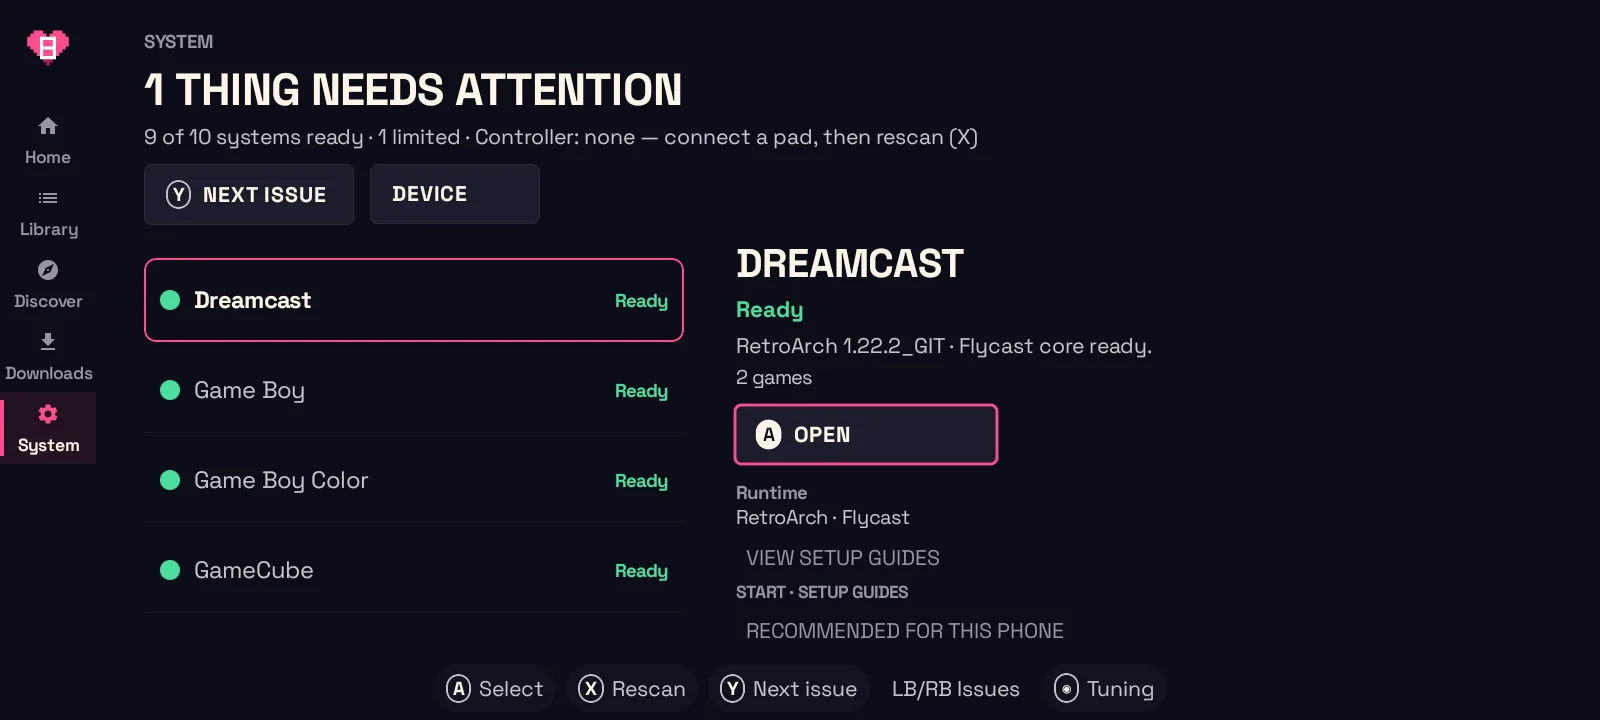
-
Download the APK. Get
GameBEX 1.0.0on the device itself, or copy it over from a computer. Release notes and SHA-256 are on GitHub.
-
Allow the install. Open the APK. Android asks you to allow installs from the app you opened it with (your browser or file manager), so turn on Allow from this source, go back, and tap Install.
-
Grant All files access. On first launch GameBEX asks for All files access (Settings → Apps → GameBEX → All files access → Allow). It needs this to read game folders on the SD card and hand files to emulators. Without it, SD card volumes are skipped and Home shows a reminder to grant it.
-
Add your games. Either:
- put games in
GameBEX/<system>/on the SD card (for exampleGameBEX/snes/,GameBEX/psx/,GameBEX/dreamcast/), or - keep your existing folders and add them under System → Device → Game
folders. ES-DE, RetroArch, and Batocera style
<root>/<system>/layouts work, including common folder names such asmegadriveorps1.
The folder names for every system are on the Supported systems page. If there is no SD card, GameBEX uses
Download/GameBEX/in internal storage.You can also import a plugin under System → Device → Game sources, which lets you browse and download from a compatible ROM site inside the app. The Source plugins page explains how.
- put games in
-
Install emulators from System. The System screen lists each system’s readiness. Choose Install (or Get for emulators that only have a store or website download) next to anything marked Not installed. RetroArch cores are downloaded automatically from the official Libretro buildbot the first time you play a game that needs them.
-
Play. Open a game. If it still needs something, such as a BIOS file, disc preparation, or an emulator, the game page shows Finish Setup and says exactly what is missing. Otherwise press Play.
Optional: Shizuku for full controller setup
Section titled “Optional: Shizuku for full controller setup”GameBEX configures RetroArch for your controller on its own. Standalone
emulators (Dolphin, Flycast, NetherSX2, Vita3K) keep their settings in
Android/data, which Android 11+ blocks for other apps, even with All files
access. Shizuku is a free app that lets GameBEX
edit just those emulator config files with your permission.
-
Install Shizuku from its official site or Google Play.
-
Start Shizuku. Open the Shizuku app and pick one of its start methods:
- Wireless debugging (no computer): enable Developer options (tap Build number seven times in Settings → About), turn on Wireless debugging, then in Shizuku choose Pairing, enter the pairing code Android shows, and tap Start.
- With a computer: connect over USB with USB debugging on and run the
adbcommand Shizuku shows under Start via adb. - Rooted devices: tap Start under Start (for rooted devices).
-
In GameBEX, open System → Device → Controls & text size, choose Set up emulators for this controller, then Allow Shizuku access and accept Shizuku’s prompt. Setup re-runs as soon as access is granted.
Updating
Section titled “Updating”- Install the new APK over the old one. Your settings, library, and downloads carry over. Don’t uninstall first, because that erases GameBEX’s settings (your game files on the SD card are never touched either way).
- Android only accepts an update signed by the same key as the installed copy. If the installer reports a conflict, you are mixing builds from different sources (for example, a self-built debug APK and a release APK).
- After a big update the library may rebuild itself with a rescan. Game files, saves, and emulator settings are not affected.
- Emulator updates are separate. GameBEX only installs emulator builds it has pinned and checksum-verified; the System screen shows Update available when there is one to install.
Next: Getting started walks through the first session.